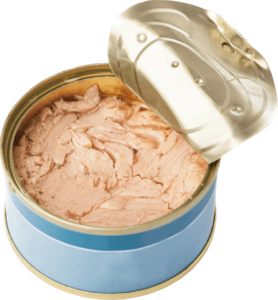
Canned tuna is a staple in many households, offering a convenient and nutritious meal option. While most people are familiar with the tuna itself, the process of manufacturing the cans that hold this popular product is equally fascinating. Let’s dive into the step-by-step journey of how these cans are made, exploring the variety of materials used and their respective pros and cons.

Step 1: Selecting Raw Materials
The process starts with choosing the raw materials. The primary metals used for making cans are aluminum and tin-plated steel. Each metal has its advantages and disadvantages.

Aluminum
- Pros: Lightweight, highly resistant to corrosion, excellent for preserving food.
- Cons: More expensive than steel, less durable in terms of structural strength.
Tin-Plated Steel
- Pros: Strong and durable, cost-effective, good for stacking and shipping.
- Cons: Heavier than aluminum, requires a protective coating to prevent corrosion.
Step 2: Rolling and Cutting
The chosen metal sheets are rolled into thin, flat sheets and then cut into smaller pieces called “blanks.” The size of these blanks depends on the dimensions of the final can. Precision is crucial at this stage to minimize waste and ensure uniformity in the following steps.
Step 3: Forming the Can Body
The blanks are fed into a machine called a “bodymaker,” which shapes them into cylindrical can bodies. This is typically done through a process called “deep drawing and ironing” (D&I). In deep drawing, a punch pushes the blank into a die to form a cup shape. Ironing then thins the walls of this cup and extends its height, creating a uniform, cylindrical can body.
Step 4: Trimming and Necking
Once the can bodies are formed, they are trimmed to the desired height. The necking process follows, where the top edge of the can is gradually narrowed to create a neck. This step is essential for ensuring that the can lid fits perfectly and can be sealed securely.
Step 5: Coating and Printing
To prevent the metal from reacting with the tuna and to ensure food safety, the interior of the can is coated with a protective lacquer. This coating is typically applied through a spray process and then cured in an oven. The exterior of the can is also printed with labels and branding information using high-speed printing machines. This not only provides information to consumers but also enhances the product’s visual appeal.
Step 6: Making the Lids
Simultaneously, the can lids are manufactured from similar metal sheets. The lids are stamped out and shaped using high-precision dies. They are then coated with a protective layer, similar to the can bodies. Many lids also include a pull-tab feature for easy opening, which is formed during this stage.
Step 7: Quality Control
Quality control is a critical part of the can manufacturing process. Each can and lid undergoes rigorous inspections to check for defects, such as cracks, pinholes, or improper coatings. This ensures that only cans meeting strict quality standards proceed to the next stage.
Step 8: Assembly and Sealing
Finally, the cans are assembled. Empty cans are transported to tuna processing facilities, where they are filled with pre-cooked tuna. The lids are then placed on top and sealed using a process called “double seaming.” This involves mechanically interlocking the lid and the can body to create a hermetic seal, which is vital for preserving the tuna and preventing contamination.

Comparing Materials: Aluminum vs. Tin-Plated Steel
Understanding the pros and cons of aluminum and tin-plated steel helps in appreciating why both materials are commonly used:
- Durability: Tin-plated steel offers superior durability and is less prone to denting compared to aluminum. This makes it ideal for stacking and transporting.
- Weight: Aluminum’s lightweight nature makes it easier to handle and reduces shipping costs. This is particularly advantageous for consumers who prioritize convenience.
- Corrosion Resistance: Aluminum naturally resists corrosion without needing additional coatings, whereas tin-plated steel requires protective lacquers to ensure food safety.
- Cost: Tin-plated steel is generally more cost-effective, which can be a deciding factor for manufacturers looking to produce large quantities of canned goods.
Conclusion
The manufacturing of cans for canned tuna is a complex and precise process that involves multiple stages, from raw material selection to quality control. Each step is crucial in ensuring that the cans are durable, safe, and capable of preserving the tuna’s quality. Whether made from aluminum or tin-plated steel, these cans are designed to protect and preserve their contents until they reach your pantry. The next time you open a can of tuna, you’ll appreciate not only the delicious contents but also the intricate journey the can itself has undergone to reach your pantry.
